• Skip to primary navigation
  • Skip to main content
  • Skip to primary sidebar

Grit By Name and By Nature

  • Home
  • Recipes
  • About Grit
  • Healthy Living
    • Plant Strength Series
    • Gritention Setting
    • The Acne Series

Archives for March 2019

HIIT Routine #2: 30 X 30

March 28, 2019 by Margaret Phillips

This HIIT Routine is simply a GR8 one because you only need to remember five moves (we all have those days, ammirite??) and the continuous pace of the workout makes it FLY by.

Now that being said… be prepared . It’s BREW TOLE.

The format for the work out is as follows: 4 Rounds, 5 moves per round. Each round is exactly the same. Perform Move 1 for 30 seconds, followed by a 30 second rest before you advance to the next move. Each round is 5 minutes long (including rest time) for a total of 20 minutes.


ROUND 1 through 4

BURPEES: 30 seconds on, 30 seconds rest

WALL PUSH-OFFS: 30 seconds on, 30 seconds rest

FLOOR TO CEILING JUMPS: 30 seconds on, 30 seconds rest

SQUAT KICKS: 30 seconds on, 30 seconds rest

TUCK JUMPS: 30 seconds on, 30 seconds rest

Go back to the beginning ↟ and repeat for a total of 4 Rounds.


Below are instructional videos for the moves in the HIIT workout above:

MOVE 1: Burpees

MOVE 2: Wall Push-Offs

MOVE 3: Floor to Ceiling Jumps

MOVE 4: Squat Kicks

MOVE 5: Tuck Jumps

And that’s it! Per usual, if you have any questions or simply want to connect, feel free to shoot me an email or find me on Instagram: @gritbyname
Filed Under: Fitness

HIIT Routine #1 : 20 X 10

March 28, 2019 by Margaret Phillips

The layout for this routine, and all of my HIIT routines, is SIMPLE. After the description of the workout, there are instructional videos for all the moves. The format for the workout is as follows:

Perform 4 rounds total, with two different moves in each round. You will complete Move 1 of each round 4 times consecutively. Each time, you perform the move for 20 seconds, with a 10 second break in between reps, repeating until you have done the move 4 times. Then, you transition directly to Move 2, again completing it 4 times in a row for 20 seconds, with a 10 second break in between reps. After this, take a one minute rest, which completes the round. Following this one minute rest, begin the next round until you have done 4 rounds total. Each round is 5 minutes (including rest time). If this paragraph is beyond confusing 😊 just skip to the description directly below ↡


ROUND 1

Resistance Band Sprints : 4 X [20 seconds on, 10 seconds rest]

Wall Push-Aways: 4 X [20 seconds on, 10 seconds rest]

1 MINUTE REST

ROUND 2

Launch Jumps: 4 X [20 seconds on, 10 seconds rest]

Elevated Toe Taps: 4 X [20 seconds on, 10 seconds rest]

1 MINUTE REST

ROUND 3

Forward Jump,Run Backs: 4 X [20 seconds on, 10 seconds rest]

Samurai Pulls: 4 X [20 seconds on, 10 seconds rest]

1 MINUTE REST

ROUND 4


Half Burpees : 4 X [20 seconds on, 10 seconds rest]


Jumping Lunges : 4 X [20 seconds on, 10 seconds rest]


Below are instructional videos for the moves in the HIIT workout above:

Move 1: Resistance Band Sprints

Move 2: Wall Push-Aways

Move 3: Launch Jumps

Move 4: Elevated Toe Taps

Move 5: Forward Jump, Run Backs

Move 6: Samurai Pulls

Move 7: Half Burpees

Move 8: Jumping Lunges

And that’s it! Per usual, if you have any questions or simply want to connect, feel free to shoot me an email or find me on Instagram: @gritbyname
Filed Under: Fitness

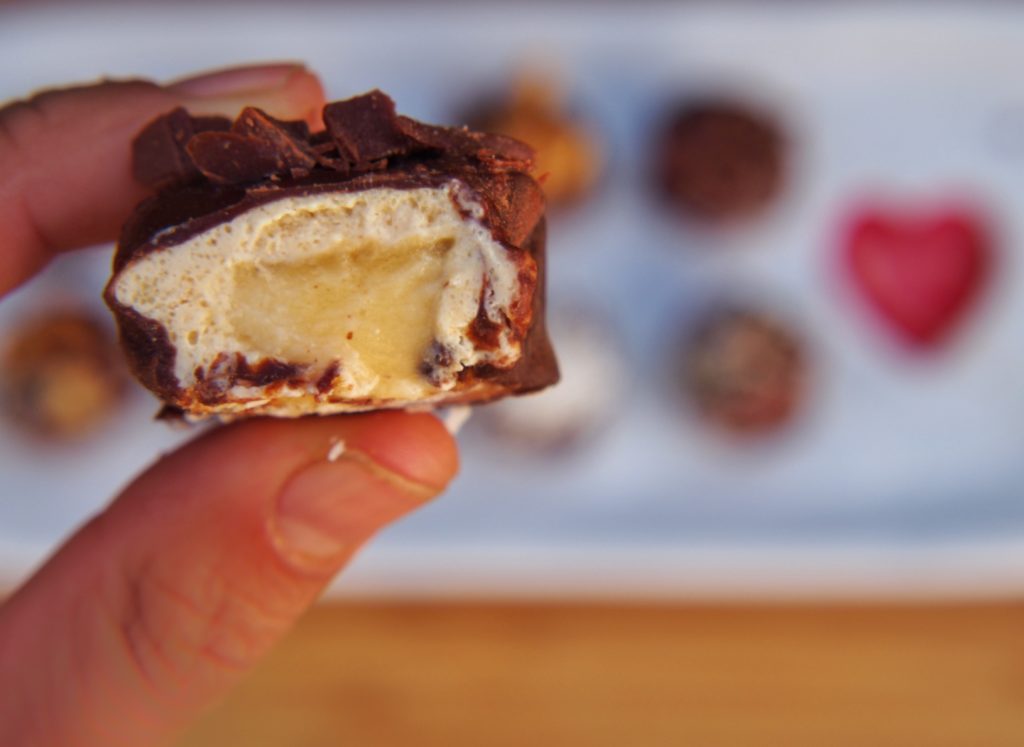
Peanut Butter Chocolate Dilly Bar Banana Bites (Grain-free, gluten-free, sugar-free)

March 27, 2019 by Margaret Phillips

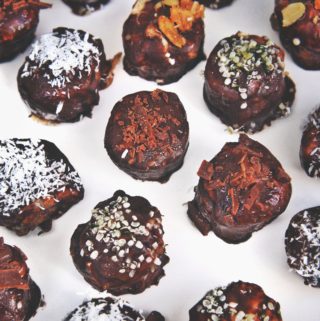
It’s very important in our home to have snacks. Lots and lots of snacks. Or chaos TRULY can ensue. Which is why I am making these Peanut Butter Chocolate Dilly Bar Banana Bites all. the. time.

I think the best way to illustrate the importance of this recipe is by starting this post with a little insight into our El Lay lives.

A few months ago, our apartment was broken into. The culprit really didn’t take anything, but he/she trashed the place, leaving mud everywhere and our doors wide open. I’m lucky because it could have been a lot worse, but it still left me feeling shaken and insecure in my apartment.

About a week after that, C had a school event that went late, so I went to bed before he got home. Right after falling asleep, I woke up to the noises of someone with mud encrusted boots on walking around in our living room. Instinctively, I threw my arm across the bed to wake up C but when I did, I immediately froze with fear. C wasn’t in the bed. Of course, I thought, I just went to bed… he won’t be home for a few HOURS. I grabbed the kettlebell I keep under my bed (I know, a 30-lb kettlebell is v intimidating to a ruthless murdery home invader), pre-dialed 9-1-1 into my phone, and slowly rounded the corner into the living room.

I was both shocked and appalled by what I saw next. An undies-clad C was sitting on the couch in the living room, eyes closed, holding a half-eaten baguette in his hands (I was carb loading for a marathon at the time so I bought that baguette for me)

Yes, my C was sleep eating a three-foot-long baguette.

I double checked the time on my phone, and realized that it was 3AM; I had been asleep for HOURS. I watched in awe as C consumed literally FEET of baguette in his sleep. I must have been standing there awhile because he eventually woke up and was equally as weirded out to find me in front of him in my jammies, clutching my kettlebell to my chest.

Marriage man… it’s a weird thing.

The point I am trying to get across here, is that C is a master snacker. The kid requires a LOT of food. I grew up with brothers, I thought I knew what I was in for, but feeding C is like throwing sand dust into an incinerator. No matter how big his meals are, he’s CONSTANTLY snacking. And I’m not exaggerating, I will wake up with crackers embedded in my shoulders (#sexi) because my husband even sleep snacks.

So as you can see, I need to keep our kitchen STOCKED with healthy snacks, because if I don’t, C dives into the world of prepackaged cookies, crackers, chips, and candies. And while those things are great once in a while, they don’t do any favors to the tummy of my Crohn’s-ridden husband. 

One of my favorite go-to’s (and probably C’s favorite) are my paleo Peanut Butter Cup Dilly Bar Banana Bites. It’s a lot of words, I know, but the treat lives up to all of them. First of all, they are stupid easy to make, the ingredients are cheap, and they are stored in the freezer, so I can make HUGE batches at a time. They’re a rounded-out snack of protein, fat, and carbs, so they actually fill C up and keep him full (at least somewhat full… it is C after all) and TBH, I love them too. If a Reece’s peanut butter cup and a DQ Dilly Bar had paleo a baby, this would be it.

Perhaps the best part is that C can sleep eat these bad boys all night long without leaving me afraid n kettlebell-armed on the phone with the police in our living room at 3AM. I’m sure you can relate.

So WITHOUT FURTHER ADO: I present to you, paleo Peanut Butter Cup Dilly Bar Banana Bites.

Peanut Butter Chocolate Dilly Bar Banana Bites

(grain-free, gluten-free, sugar-free)
Print Recipe Pin Recipe
Prep Time 10 mins
Total Time 10 mins
Course Dessert, Snack
Cuisine American
Calories 40 kcal

Ingredients
  

  • 2 banana
  • 1/2 cup plain greek yogurt
  • 1 tbsp natural peanut butter
  • 2 tbsp powdered peanut butter (or additional natural peanut butter)
  • 1 tbsp maple syrup
  • 2 tbsp coconut oil
  • 2 tbsp coconut butter (or additional coconut oil)
  • 2 tbsp cacao
  • toppings as desired

Instructions
 

  • Combine Greek yogurt, peanut butter, peanut butter powder, maple syrup, and gelatin in blender. Blend until well combined. Place in the freezer while you slice bananas into approx 1/2-inch slices.
  • Take mixture out of freezer and place one spoonful on top of each banana slice. Place banana slices back in freezer while you prepare the chocolate coating.
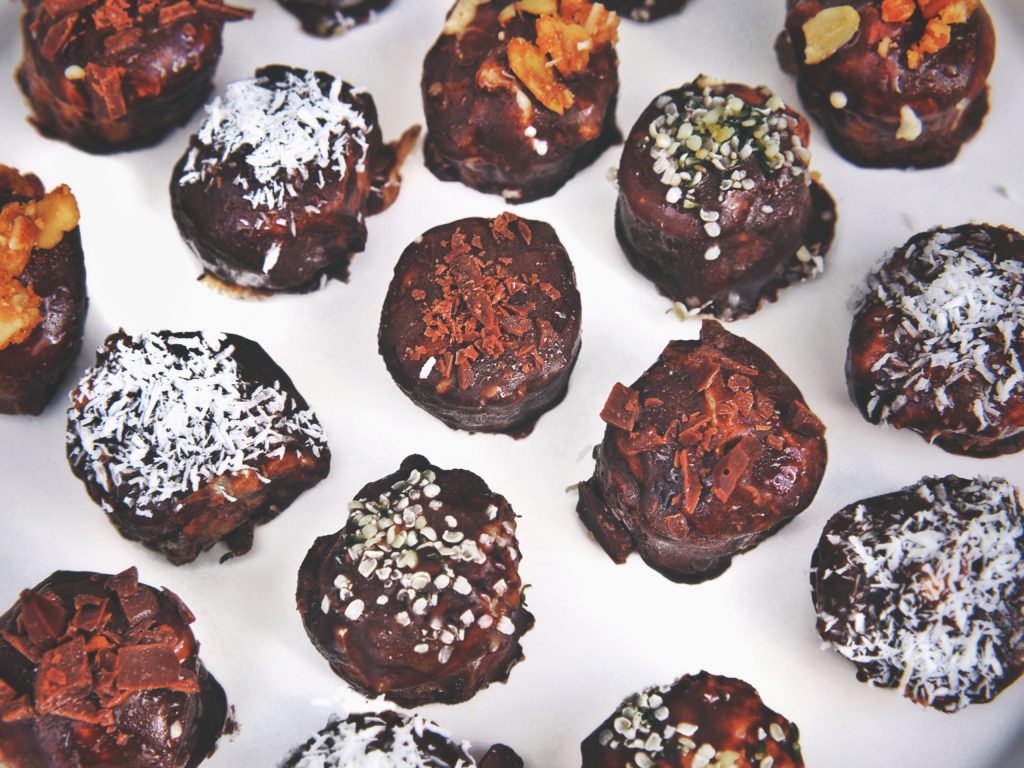
  • Melt coconut oil and butter until liquid (this takes approx no time so keep your eyes on it… I melt it in a mug in my toaster oven). Stir in cacao. Take your topped banana slices out of the freezer and cover them in you chocolate mixture. If you’re going to add toppings, add them immediately as the chocolate hardens pretty quick. I love topping mine in hemp hearts and coconut. Chris loves chocolate and paleo granola… you do you 🙂 
Keyword banana, chocolate, dessert, easy, gluten-free, grain-free, low-sugar, peanut butter

Filed Under: Breakfast, Dessert, Recipes

Peanut Butter Fat Bomb Muffins with a Peanut Butter Coconut Frosting (Paleo, Keto, Grain-free, Gluten-free, Sugar-less)

March 15, 2019 by Margaret Phillips

Alright folks… the blog has been live for a couple months now, so it’s about time I talk a little bit about engineering.

I recently went on a work trip to Nashville, Tennessee. What a fun area, right? The live music, the beautiful mountains, the amazing food, the rich historical architecture, the top of the line boiler manufacturers, the revolutionary plastic pipe fabricators… oh, I’m sorry… Is that not what you go to see when you visit Nashville? Have I lost you? How strange.

Well if you’re as #lucky as I am, that IS what you see when you go to Nashville. Especially when a big fat fancy boiler company books your flight out there from LA, covers the hotel, and hosts a two-day long factory tour, with fancy equipment, fancy demonstrations, expensive show floors, and extravagant technical presentations… and boy oh boy, was I impressed. By the peanut butter.

On the first day, we were given a breakfast spread upon arrival. What is it about breakfast spreads? You could cut up cardboard, put it on plates, serve it with coffee, tell me it’s a breakfast spread, and I would ooh and ahh over the lovely and thoughtful treat. Needless to say, when it comes to breakfast spreads, I’m easy to please.

So when I spread some assumed run-of-the-mill no-name label-less peanut butter on to my cardboard (maybe it was toast? A bagel? PVC pipe? WHO KNOWS FRIENDS) and bit in, I was SHOCKED. Confused. AMAZED. Peanuts were dancing upon my tongue. My taste buds sang out in choruses of joy and worship. My mouth shone with the light of a thousand suns. This peanut butter didn’t belong in the breakfast spread. It belonged in a shrine. A temple. A pair of AGs.

I spent the rest of the tour thinking about this peanut butter, talking about my peanut revelation to anyone who would listen to my new heightened appreciation . Because HELLO, I already loved peanut butter. It’s cheap, it’s delicious, and all you need is a spoon and a jar for a delicious sugar-free dessert. Plus, it packs a fatty PUNCH with a gentle butterfly kiss of protein. I mean c’mon man. What’s not to love.

But this peanut butter—it was NEXT LEVEL. In fact, by the time I finished the tour, the boiler factory staff was so… aware… of my… appreciation… that before I left, they sent me home with the jar. “Perhaps if we just give her the f—ing peanut butter, she’ll shut the hell up about it and we can get back to boilers”.

OH BOY WERE THEY WRONG. Because I’m still going on about the peanut butter.

So when I arrived back home, a new fat bomb muffin was created. A muffin that properly packs the peanut buttery punch captured in that magnificent jar. Another #PHAT muffin that I can eat every morning without the sugar and carbs that make my energy levels crash and cause me to crave crap food in my cube.

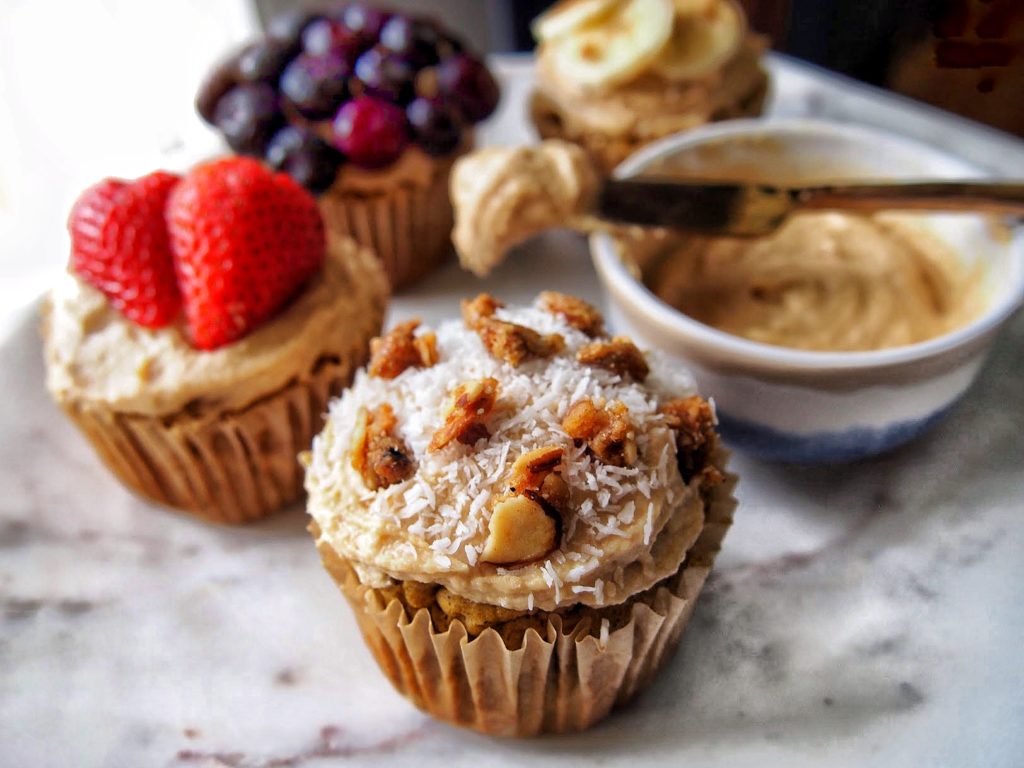
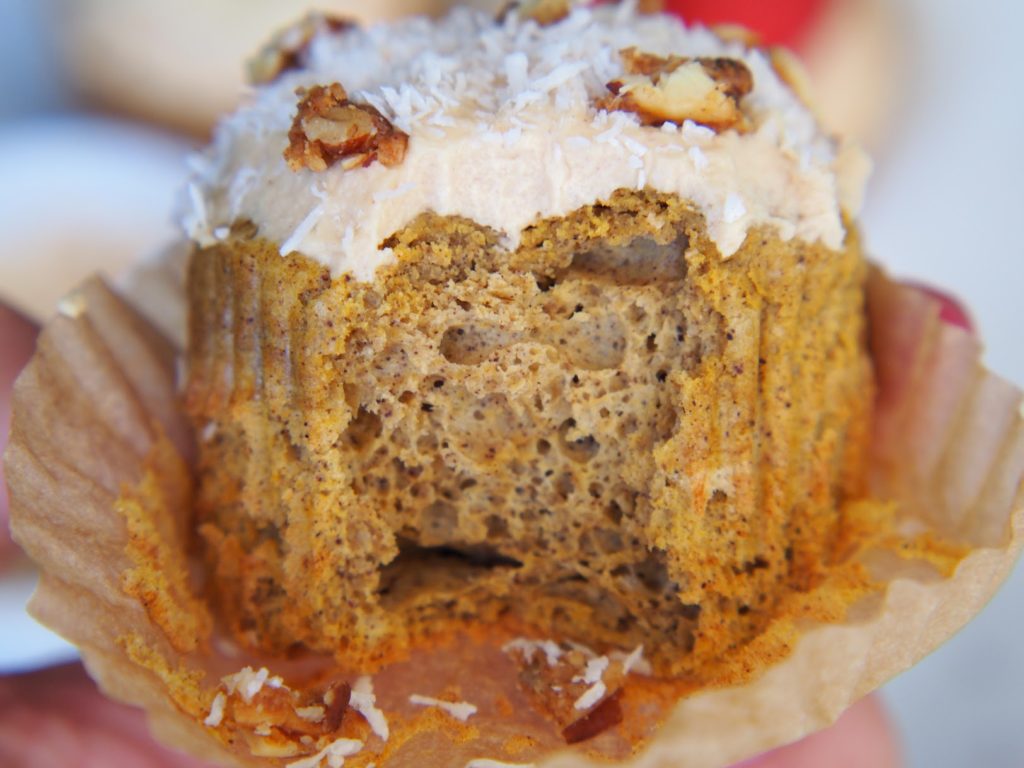
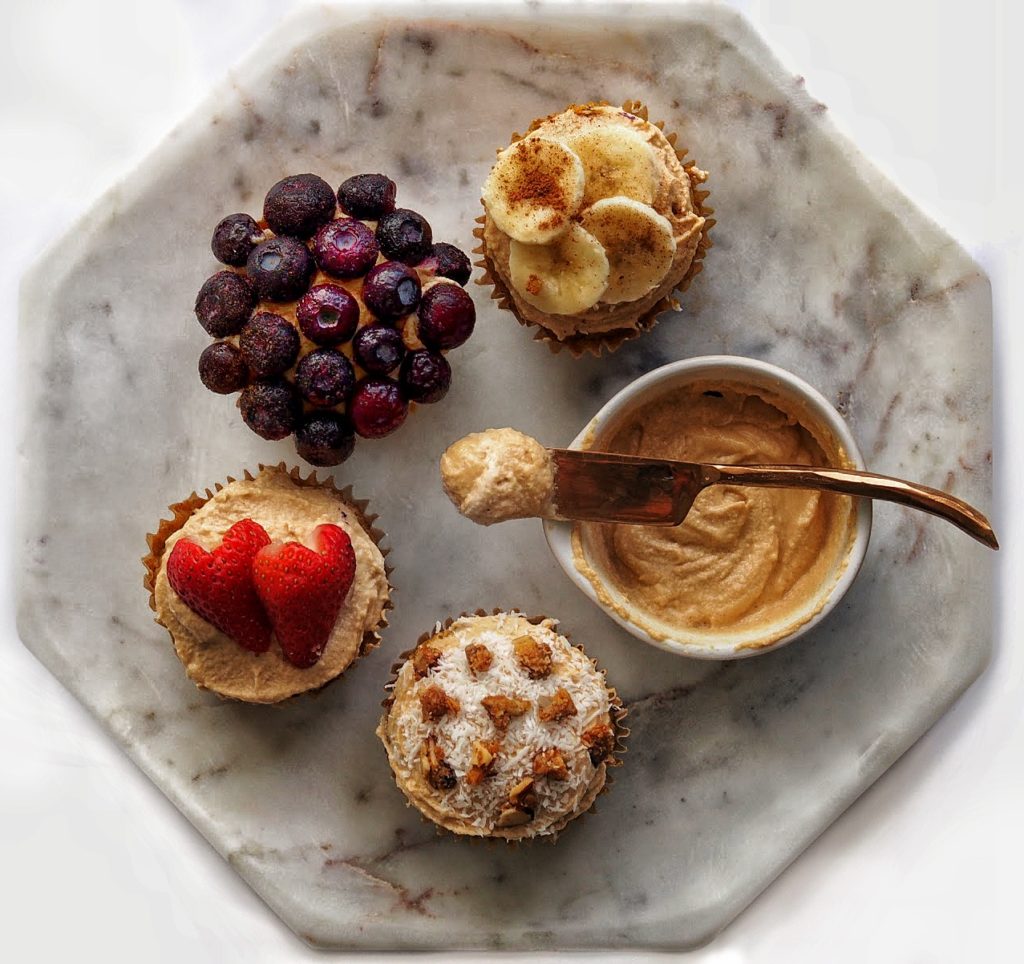
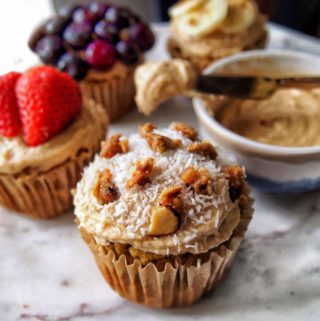
These delicious muffins are grain-free, gluten-free, keto, paleo, fluffy, protein-powered, and feature a creamy paleo coconut peanut butter frosting. It’s a regular in my fatty muffin circulation (if you know, you KNOW) and they whip up so fast. Plus you can add whatever toppings you happen to be craving that day… I have featured some of my favorites here: banana and cinnamon (esp if you’re subbing mashed banana for pumpkin, see below), strawberries, blueberries, and OF COURSE coconut (this should surprise absolutely no one).

Plus, having this magnificent peanut butter in a muffin felt a little less weird than eating it out of an opened jar of peanut butter that had been shared by a large group of strangers and gifted to me by a factory floor worker. EITHER WAY, it’s worth the #healthrisks 😊

Ok no more engineering talk. Let’s get into the recipe.

Peanut Butter Fat Bomb Muffins with Paleo Peanut Butter Coconut Frosting

(Paleo, keto, grain-free, gluten-free, low-carb, high fat)
Print Recipe Pin Recipe
Prep Time 15 mins
Cook Time 15 mins
Total Time 30 mins
Course Breakfast
Cuisine American

Ingredients
  

Peanut Butter Fat Bomb Muffins

  • 1/2 cup powdered peanuts (or powdered peanut butter)
  • 1 tbsp cinnamon
  • 2 tsp baking powder
  • 1/4 tsp baking soda
  • 3 tbsp rice protein (I use vanilla)
  • 1/4 tsp xantham gum
  • 1/4 cup peanut butter
  • 1/4 cup ghee (or butter, melted)
  • 1/4 cup coconut oil (liquid)
  • 1/2 cup pumpkin (can sub mashed banana for a little sweetness)
  • 4 eggs

Paleo Peanut Butter Frosting

  • 1/4 cup plain Greek yogurt
  • 1/4 cup coconut butter
  • 1/4 cup peanut butter

Instructions
 

Peanut Butter Fat Bomb Muffins

  • Preheat your oven to 350F and line or grease or muffin tin.
  • Combine all dry ingredients in a small bowl.
  • Separate the egg whites and egg yokes. Combine egg yokes and the remaining wet ingredients (I warm up my coconut oil, ghee, and peanut butter in a mug before adding to the yokes and pumpkin)
  • Whip egg whites until a firm peak forms.
  • Combine dry and wet ingredients and mix well. Gently fold in egg whites.
  • Spoon mixture into muffin tin (approx 3/4 full). Bake for 14-16 minutes. Let cool while you prepare the frosting.

Paleo Peanut Butter Frosting

  • Melt coconut butter. Add peanut butter, coconut butter, and Greek yogurt into a blender. Blend on low speed until all ingredients are well combined. Use to top cooled peanut butter muffins.

Notes

DISCLAIMER: I live in a shit apartment with a shit oven. When I preheat my oven, I also preheat my apartment. Remember this when considering my baking times.
Keyword gluten-free, grain-free, keto, low carb, low-sugar, muffin, paleo, peanut butter

Filed Under: Breakfast, Dessert, Recipes

Personal Pan (Egg) Pizzas (paleo, keto, grain-free, gluten-free, high protein)

March 9, 2019 by Margaret Phillips

C and I don’t have any kids. We also don’t have any pets or nieces or nephews (YET). What we do have, is pizza <3

When we got married were considering what to do with our last names (Peterson + Phillips = Pete-lips #sexi), we seriously considered throwing caution to the wind and going with C and Grit Pizza (Except just the emoji because we’re meta like that). And when we told our family of the consideration, they were 0% surprised. Because our dedication to the ‘za is very real.  

I’m all for giving your body what it asks for, but C and my bodies are ALWAYS asking for pizza, and under no circumstances should you eat the same food for every meal on every day of the week (Right? Pizza for every meal is definitely bad. Or is it? No it is. It definitely is.) so it goes without saying that we have a lot of pizza variations in our repertoire.

Now I know there’s a lot of grain-free pizza options out there today. But sometimes I just don’t feel like ricing my cauliflower and blending it and cooking a cauliflower crust and then prepping toppings and THEN baking the pizza. Actually, I never feel like doing that. And a frozen cauliflower pizza at Whole Foods costs 9 dollars! NINE DOLLARS!!! One of those pizzas = MAYBE one meal for C. Listen Linda, I don’t have that kind of cash.

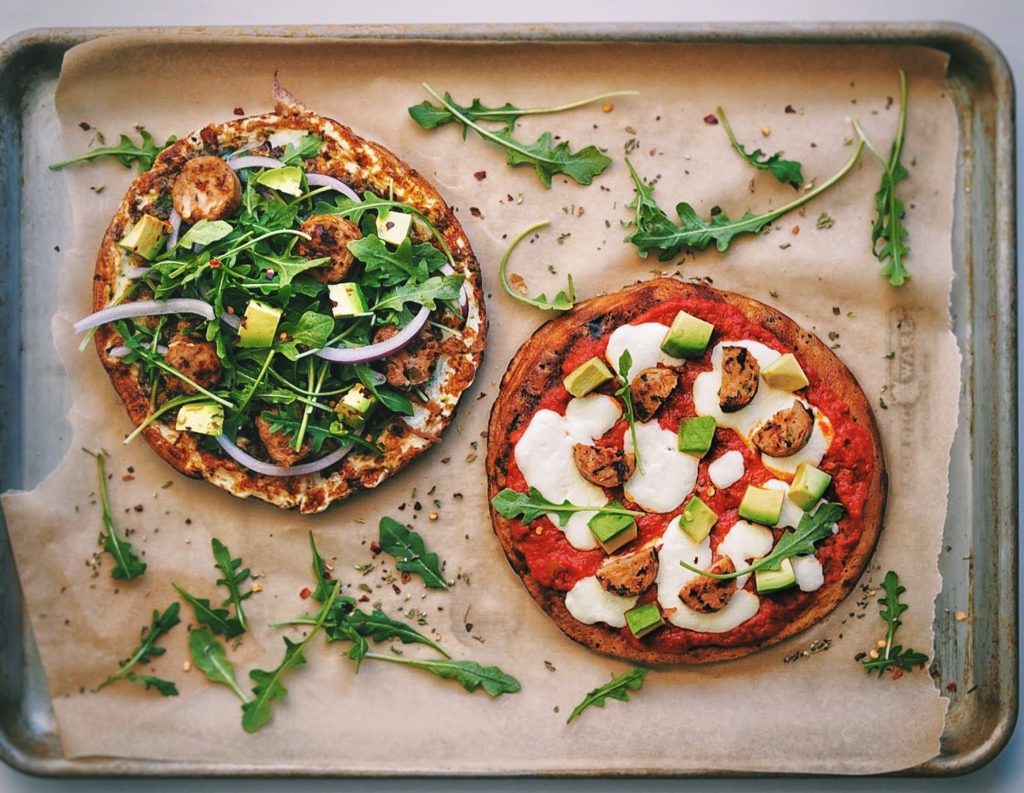
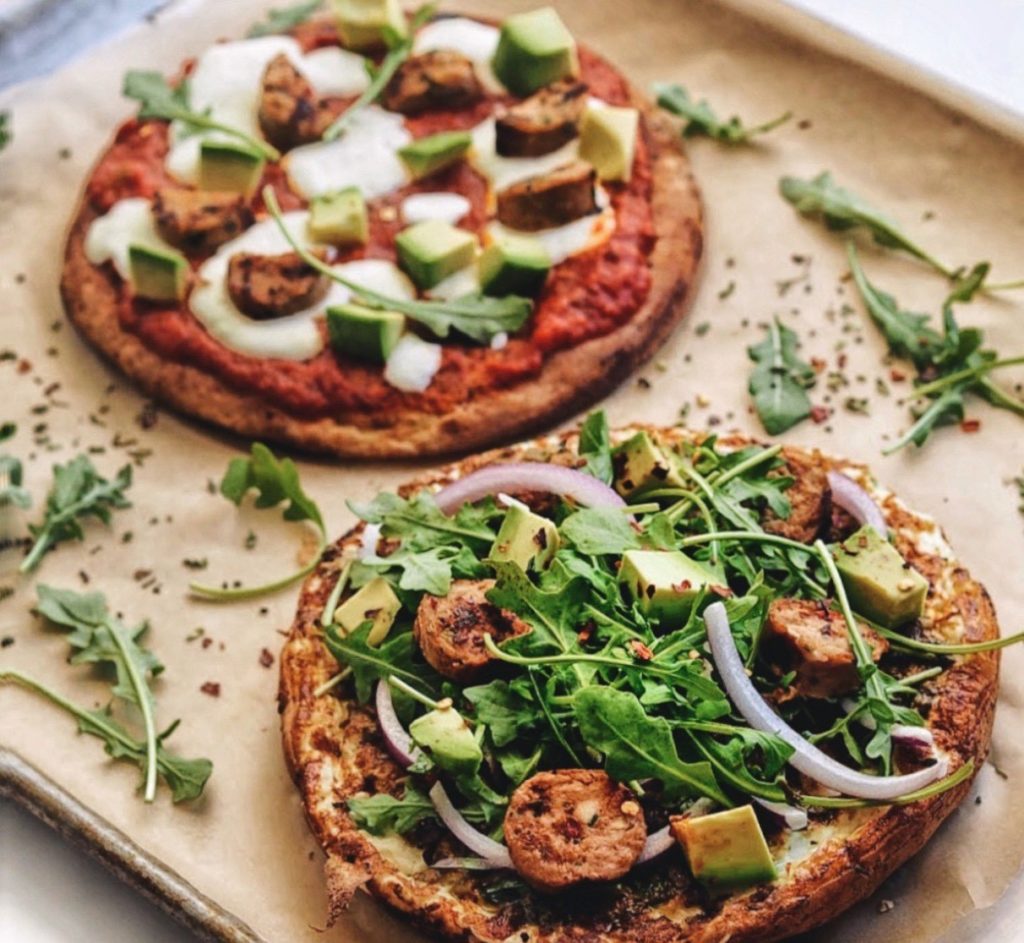
So for my brothers and sister who need the ‘za but also need an array of vitamins and nutrients like normal grown-up adults, I give you these Egg ‘Zas.

Like all my fav meal recipes, this one whips up in a flash, plus it’s totally scalable (so C can get enough food without eating all of my portion as well) and customizable (because C eats like a boring banana and I like a little greens in my life). It’s super high protein and there’s not a grain in sight.

I make my “crust” with egg whites and I make Chris’ with full eggs. Feel free to do a mixture of both! And double bonus, these paleo pizzas are adorable af. So if you need a cheap and easy dinner option to please all the picky eaters in your household, these Egg ‘Zas are 4u.

Personal Pan (Egg) Pizzas

Keto, paleo, grain-free, gluten-free
Print Recipe Pin Recipe
Prep Time 10 mins
Cook Time 10 mins
Total Time 20 mins
Course Breakfast, dinner, lunch
Cuisine American
Servings 2 people

Ingredients
  

C’s ‘Za

  • 4 eggs
  • 1/4 cup shredded mozzarella cheese
  • 2 cloves garlic (minced)
  • 1/4 cup organic pizza sauce
  • 1 pack Belgioioso mozzarella snacking cheese (for topping)
  • 1/2 all natural chicken sausage (cooked, optional)
  • 1/4 avocado (chopped)
  • 1/4 green onion (chopped)

Grit’s ‘Za

  • 1 cup egg whites
  • 1/4 cup shredded mozzarella cheese
  • 1 tsp crushed red peper
  • salt and pepper to taste
  • 4 cloves garlic (minced)
  • chopped red onion (for topping)
  • 3 tbsp pesto sauce
  • 1/4 avocado (chopped)
  • 1 handful arugula
  • 1/2 all natural chicken sausage (cooked, optional)

Instructions
 

C’s Za

  • Whisk your eggs, shredded mozzarella cheese, salt, pepper, and garlic in a bowl. Pour into a non-stick frying pan and cook on medium low heat (just like an omelet) until the center JUST starts to solidify. Careful not to burn!
  • Flip omelet and let it finish cooking. While it finishes, top with pizza sauce, chicken sausage, green pepper, snacking mozzarella. To get the extra gooey cheese on top, sometimes I pop C’s pizza into the toaster oven on “warm” while I cook my ‘za. 
  • Right before serving, top with avocado.

Grit’s Za

  • Whisk your egg whites, shredded mozzarella cheese, salt, pepper, crushed red pepper, and garlic in a bowl. Pour into a non-stick frying pan and cook on medium low heat (just like an omelet) until the center JUST starts to solidify. Careful not to burn! It will take longer than C’s ‘za.
  • Flip omelet and let it finish cooking. While it finishes, top with pesto sauce, chicken sausage. After removing the omelet from the heat, top with arugula, red onion, and avocado.
  • Place on dish and enjoy 🙂 
Keyword egg, gluten-free, grain-free, low carb, paleo, pizza, whole 30

Filed Under: Breakfast, Main Dishes, Recipes

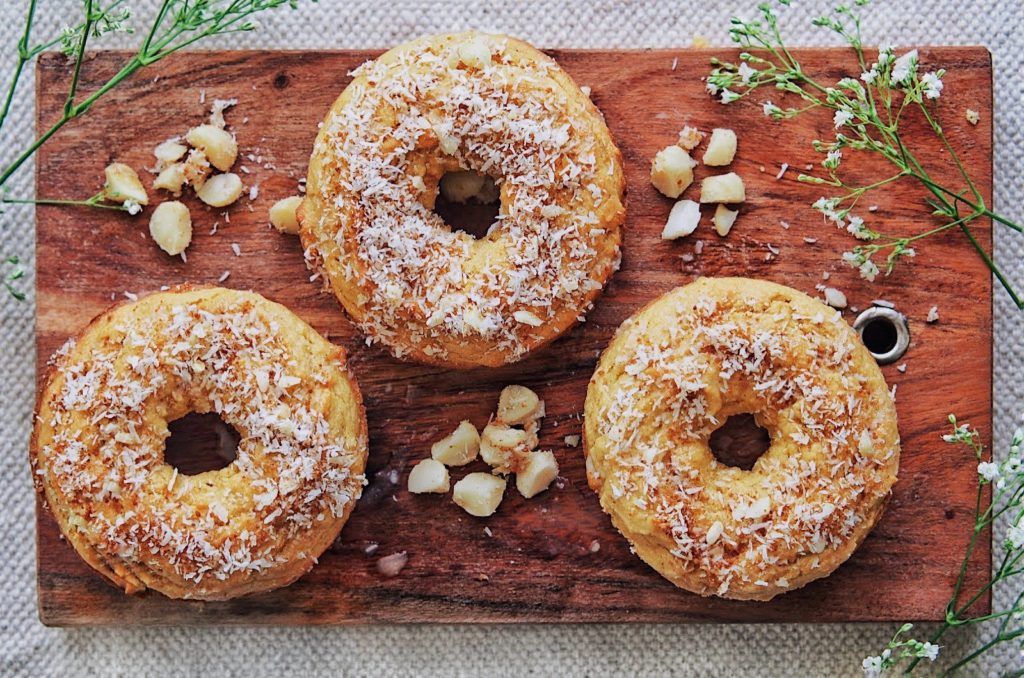
Macadamia and Coconut Donuts w/ White Cocoa Glaze (paleo, keto, gluten-free, grain-free)

March 6, 2019 by Margaret Phillips

Look, I love and appreciate all three of the macro groups, but you are all probably aware by now that I am a huge proponent of a healthy daily dose of hormone supporting fats. I’m not afraid of carbs and I know that protein is great for muscle growth, but fat just has a special place in my heart. It keeps my blood sugar stable, makes me feel full, supports my hair and my skin, and frankly, it tastes great.

I consider myself a connoisseur of fats. I’ve tried them all. Every form of nut butter, oil, fat packs, avo mouse, coconut oil, keto cup, and seed butter… you name, I’ve probably tried it. People ask me all the time which ones are best but choosing my favorite form of fat is like trying to choose a favorite child because I love and appreciate them all differently.

Well, that is except for one.

Just between you and I, there is one fatty snack that I simply cannot live without. It is the yin to my yang. It’s what I think about when I wake up in the morning and the last thing I long for before I go to bed at night.

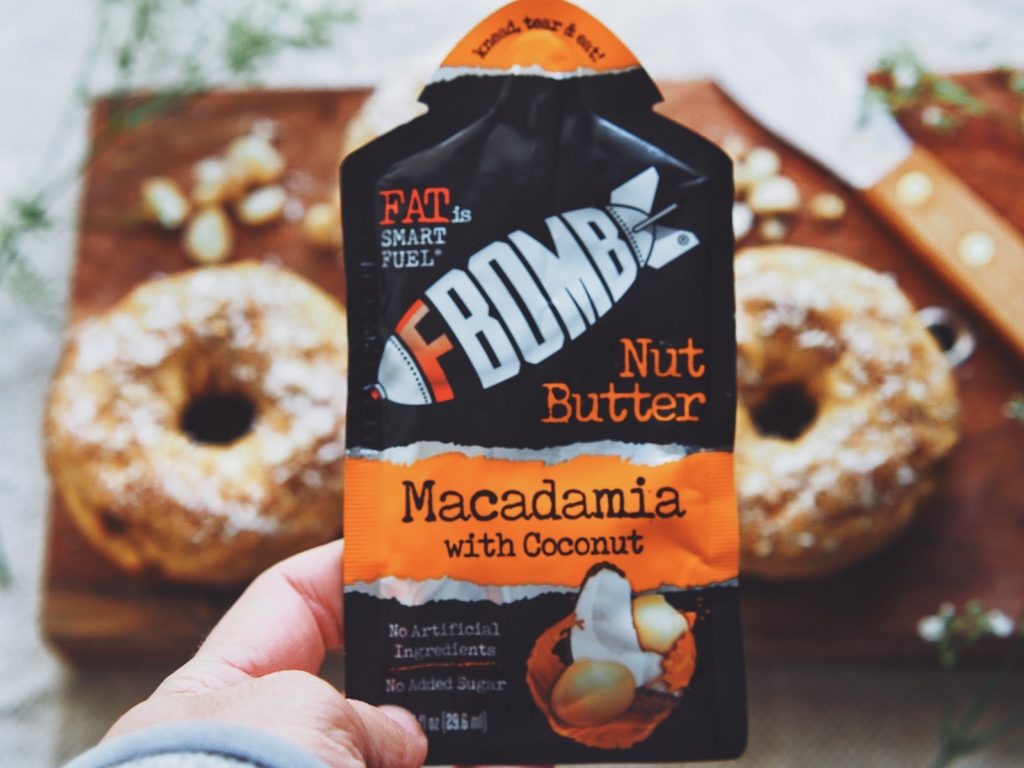
And that is FBOMB’s nut butters and oils packets.

I stumbled upon FBOMB totally by chance. C and I ran a RAGNAR with some coworkers last April and someone stuffed the free FBOMB nut butter packets into my backpack when we were hurriedly trying to clean out our van. Nut butter packets were never really my thing, but I also hate to waste food, so I packed them into the glove compartment of my car and forgot about them.

Fast forward to mid-June. Half of California is on fire and it is hotter than hell outside. Yours truly was trapped on the 405 trying to cross El Lay in the heat of the afternoon after a particularly long day spent crawling in and out of bug-infested manholes on a construction site. The fires were definitely not making traffic any better and I was tired, I was sweaty, I was stinky, I was hungry, I was cranky, I wanted to be home, and there was no way in hell I was getting off of the bumper-to-bumper freeway to grab a snack.

In a fit of self-pity and despair, I tore apart the interior of my Volkswagen bug in search of something, ANYTHING, that I could put into my stomach. I dug into the driver’s side door pocket, emptied the piles of napkins and used chap sticks out of the center console, and pulled out every single pair of sunglasses out from the nooks and crannies of the dashboard of the car. But it wasn’t until I flung open the glove compartment and pulled the entirety of its contents out onto the passenger seat next to me that I did find, lo and behold, those bright orange FBOMB macadamia nut butter packets, shining back at me.

As soon as that nut butter hit my taste buds, I knew that I could never go back. The sun shone a little brighter, the colors of the 405 freeway got a little clearer, strangers were smiling in their cars, the birds started singing, a mouse started collecting loose pearls from the ground to sew together my gown for the ball (… or something like that). I’m not trying to be dramatic, but let me tell you, my day TURNED AROUND.

Unfortunately, FBOMBs are not available in stores (at least as of recent in southern California). I try not to order things online, but FBOMBs are an exception. They’re worth it. It’s the first thing I eat every morning I’m at work. They taste AMAZING, the ingredients are so simple, and they prep my stomach for a full day of digesting.

After that life changing day in December, I fell hard for the macadamia nut FBOMB packs. I immediately became a loyal consumer. I really thought I knew what love was… BUT BOY WAS I WRONG. Because soon after I messed up an Amazon order (lol what’s new right) and accidently ordered myself the coconut macadamia nut butter combo packets. I didn’t think I could love FBOMBs any more than I already did. I thought I had it all. I didn’t. I had nothing. Because I didn’t have the coconut macadamia nut flavor.

But LOL this post isn’t even about FBOMBs so can we just move on already??

Inspired by my unfailing love of the flavor of the coconut macadamia nut FBOMB pack, the Macadamia Coconut Donuts were created. Although it PAINED me to put the FBOMB nut butter into the batter and not into my mouth, the reward proved to be worth the heartbreak.

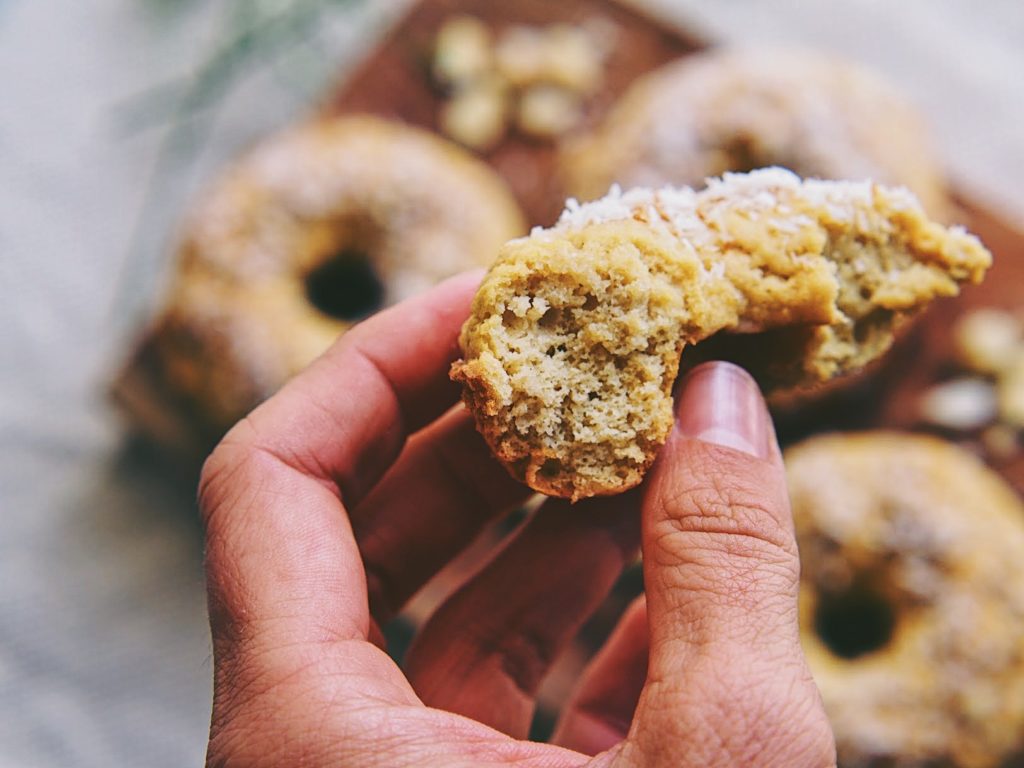
These donuts have the perfect texture and come in at only 7 net carbs per donuts. They are so filling, and the rich macadamia nut flavor goes perfectly with your morning cup of joe. They also have 7 grams of protein, which is nothing to squawk at, and a whopping 21 grams of fat to keep you satisfied all morning long.

When I’m feeling spicy af, I top them with a paleo white chocolate icing that is unbelievably easy to whip up and adds a fun chocolatey flavor to the donuts. But trust me when I say this, these donuts really hold up on their own.

So lets stop talking about FBOMBs (jk I’ll never stop talking about FBOMBs) and get into the recipe!

Macadamia and Coconut Donuts w/ White Cocoa Glaze

Paleo, sugar-free, keto, low-carb, grain-free, gluten-free
Print Recipe Pin Recipe
Prep Time 10 mins
Cook Time 18 mins
Total Time 28 mins
Course Breakfast
Cuisine American
Servings 4 donuts

Ingredients
  

Macadamia Coconut Donut

  • 3 eggs
  • 3 tbsp coconut oil (liquid)
  • 1 Macadamia Nut F bomb
  • 1 tbsp coconut sugar (optional)
  • 1/2 tsp baking soda
  • 1/8 tsp xantham gum
  • 1/2 tsp vanilla
  • 3 tbsp almond/coconut milk
  • 3/8 cup coconut flour

White Chocolate Coconut Icing

  • 2 tbsp coconut butter
  • 1 tbsp cocoa butter (or just more coconut butter if you’re not a bitter cocoa fan!)
  • 1 tsp coconut flour
  • 1 tsp coconut sugar
  • 1 tbsp shredded coconut (for topping)
  • 1 tbsp chopped macadamia nuts (for topping)

Instructions
 

Donuts

  • Preheat oven to 350 F and grease your donut pan.
  • Combine coconut flour, coconut sugar, baking soda, and xantham gum in a large bowl.
  • Separate egg yokes and egg whites. Add yokes, coconut oil, macadamia nut butter, almond milk and vanilla to your dry mixture. Blend well.
  • Whip egg whites until they form a firm peak. Fold into your donut mixture.
  • Spoon mixture into donut pan and bake for 17-20 minutes. 

Icing

  • Combine all ingredients in a small saucepan (except coconut sugar, shredded coconut, and mac nuts). Heat on low until melted (this doesn’t take long so keep your eyes on it!!). 
  • Pour over the donuts. Top with coconut sugar, shredded coconut, and mac nuts.

Notes

DISCLAIMER: I live in a shit apartment with a shit oven. When I preheat my oven, I also preheat my apartment. Remember this when considering my baking times.
Keyword breakfast, coconut, donut, gluten-free, grain-free, keto, low carb, macadamia nut, paleo

Filed Under: Breakfast, Dessert, Recipes

Plant. Phase 1: Resistance

March 5, 2019 by Margaret Phillips

DO NOT UNDERESTIMATE THE RESISTANCE BAND.

Resistance bands are amazing.

IMO, they are the most undervalued equipment and best kept secret in the fitness market. You can get a complete pack for 15 dollars, and it’s like purchasing an entire at-home gym that can be easily stored in a basket or drawer. If I can fit resistance bands in my postage stamp apartment, then anyone can.

Resistance bands are also a great way to practice form and strengthen your muscles without compromising your joints. They hit a huge range of muscles to get that #definition, and BEST PART, you can do all your resistance band workouts ~~~*AT HOME*~~~

If this post were a musical, NOW is the time where I would break into a ballad about resistance bands that would finish with a #killer key change, but alas, it’s a blog and I do not have a chorus.

……. #athlete

Look man, when I first wanted to get strong, I was confused. Dazed. Wandering. LOST. But one day, I had a stroke of luck and discovered resistance bands.

Prior to getting down with heavy weights at a gym, I spent a solid FOUR MONTHS doing exclusively resistance band workouts. I didn’t start using them with the intent of committing to a consistent resistance band routine, but the workouts were quick enough to do over my lunch break, I felt strong when I used the bands, and it was the first time I had ever observed my body looking physically stronger which kept me motivated and coming back. Plus, because I wasn’t doing HIIT and cardio all the time, the inflammation in my body was going down, making me feel so much better inside and out. I distinctly remember C insisting on taking a picture of my arms at brunch one morning, about two months into my resistance band workouts, to show me my new muscles.

I’m shocked and amazed that I was able to find this pic for you guys. S/O to C for never deleting anything.

It didn’t take long before my manly man C was doing resistance band workouts with me 😊

I still use resistance bands all the time. And I mean, ALL THE TIME. The very nature of the band allows progression as your muscles get stronger (extending the band further, increasing resistance), and they’re great for increasing flexibility. Oh and bonus, they’re great for traveling! Another benefit of starting with resistance band workouts was that by the time I was ready to go back to a gym, I felt stronger and more confident which made it more fun to be at the gym.

NOT EVEN SPONSORED (lol) I JUST LOVE EM SO MUCH OKAY? Okay.

So let’s get you going, shall we? 😊


First, order these bands from Amazon. They’re FIFTEEN DOLLARS. Friends, I have spent more money than that on a beer. Don’t mess around with the pretty sets or the influencer branded beauties. Trust me, I KNOW they’re tempting, but stay strong.


15 to 20 MINUTES

If you’re completely new to working out, or you’ve been without a routine for some time, start by committing to your new band babies 15 minutes a day three days a week (we’ll get into scaling below as you advance/if you’re already advanced). Please, PLEASE, take out a pen right now and write in the days and times you will be doing your fifteen minutes workouts. If you’re not a morning person, don’t schedule them for 6am. If you come home from work exhausted, don’t write them in for 6pm. Find a time when you’ll actually show up, write it on a post-it or your notes app. Hang that post-it somewhere easy to reference. Or send it to me and I’ll hunt you down to find out if you’re sticking to it 😊

I will though.

Okay so you’ve got your bands and you’ve got your minutes. Now let’s get you a workout!


There will be three progressions to the first phase of this series: beginner, intermediate, and advanced (Round 1 and Round 2). At the end of this post, you’ll be able to click on an option to get your PDF download to create/track your workouts (either on your phone or you can print out a physical copy).


The resistance bands will be used in an EMOM workout format. If you don’t know what an EMOM workout is (I didn’t) click here for an explanation.

Now unless you’re TOTALLY new to working out (S/O to you and this exciting step if you are!!) I would like to challenge you to set up your own workouts using the PDF downloads as templates. The reasoning behind this is as follows: 1.) You know your body best, 2.) You know your goals best, and 3.) Remember that I’m trying to set you up for LIFE here and creating your own workouts is a v important skill!! If you have weak triceps, maybe you should incorporate two triceps-focused moves into arm day instead of one. If your triceps are jacked out of their minds, maybe you should (stop showing off, you muscley beast) leave out triceps-focused moves altogether.

Don’t worry, I have provided some pre-populated templates for those of you who want to start with a little more guidance.

Almost all resistance bands that you buy will come with a guide of different moves that you can perform with the bands. In addition, I’ve provided a list of some of my favorite resistance band/body weight moves for each progression. To get started, click on your progression below! If you’re not sure which one to start with, feel free to shoot me a DM, and I can help you figure it out.

Filed Under: Fitness, Plant.

The EMOM Workout

March 5, 2019 by Margaret Phillips

EMOM stands for Every Minute On the Minute, and the youths pronounce it eeeee-mom. An EMOM workout is broken into minute-long intervals. 15 minute EMOM workout = 15 intervals. Each minute is assigned an exercise and number of reps. You have the entire minute to complete the reps and whatever time you have left over is your rest time.

For example, let’s say you’re doing an EMOM workout and your minute 1 move is 12 push-ups. You do 12 push-ups and it takes you 40 seconds. That means you have 20 seconds to rest before starting your next move!

If you were doing a 3-minute EMOM workout of push-ups, air-squats, and lunges, it could look something like this:


Minute 0-1:       12 push-ups

Minute 1-2:       12 air-squats

Minute 2-3:       12 lunges.


Simple enough right??

I know what you’re thinking… But Grit, what if the minute is up and I’ve only done 10 push-ups???

IT’S ALL OVER YOU’VE FAILED.

(just kidding)

They get incorporated into your next minute! So now your workout will look like this:


Minute 0-1:       10 push-ups

Minute 1-2:       12 air-squats + 2 push-ups

Minute 2-3:       12 lunges.


So as you can see, it’s a slippery slope, kids. You need to stay on your minute. If you find you’re slipping consistently in your EMOM workout, drop your reps, so you can complete your reps without sacrificing form and always feeling behind in your workouts.

Filed Under: Fitness, Plant.

Chocolate Chip Cookies (paleo, grain-free, gluten-free, low-carb)

March 1, 2019 by Margaret Phillips

Usually I like to start a recipe with a good quip, a little insight into the recipe inspiration, or an entertaining story for you folks. However, you will not find any of those options in today’s post.

Because sometimes your girl just wants a chocolate chip cookie.

Nothing fancy. No hidden superfoods or ulterior motives. No witty asides or embarrassing stories from the past. Sometimes I just want my apartment to smell like childhood and I want to bite into and ooey goey fluffy n delish chocolate chip cookie.

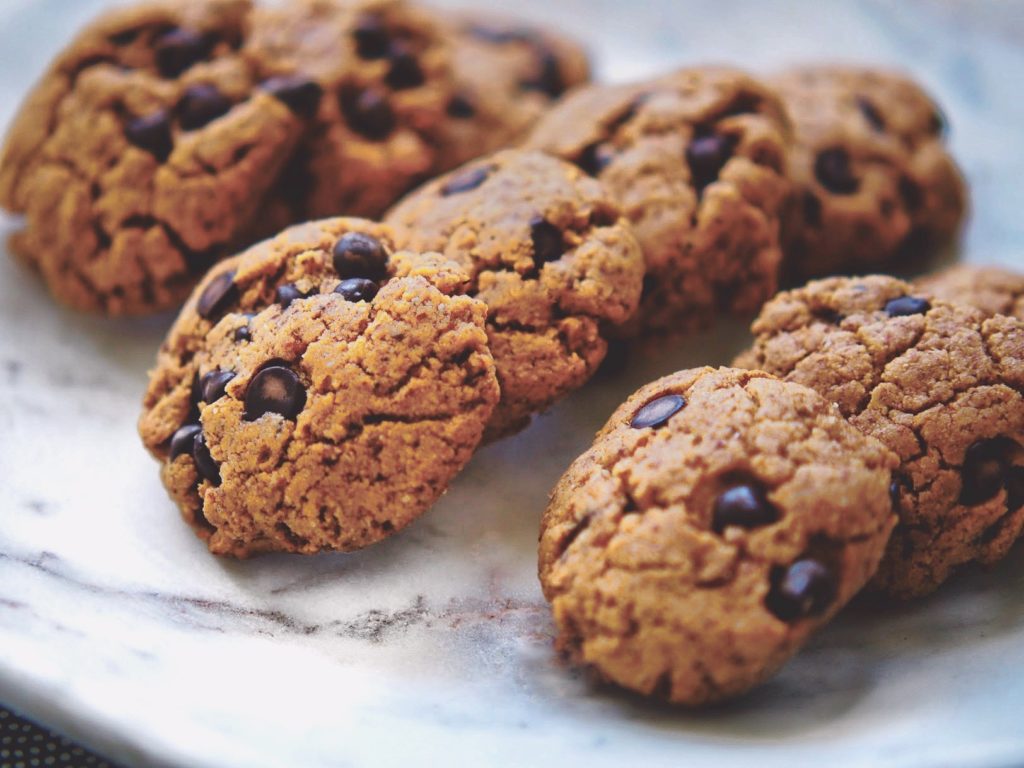
So today I give to you exactly that: a paleo, grain-free, gluten-free, low carb chocolate chip cookie that’s guaranteed to scratch that chocolate chip itch without all the extra sugar and grains that typically accompany our favorite classic. These cookies are breakfast friendly, tummy friendly, and are the perfect boost for some mid-day energy with a side of old school comfort. So without further ado, paleo chocolate chip cookie heaven 😊

Chocolate Chip Cookies

(Paleo, grain-free, gluten-free, low-carb)
Print Recipe Pin Recipe
Prep Time 8 mins
Total Time 16 mins
Course Breakfast, Dessert
Cuisine American
Servings 12 cookies
Calories 110 kcal

Ingredients
  

  • 1/2 cup almond flour
  • 1/8 cup coconut flour
  • 1/8 cup coconut sugar (or more if you like sweeter cookies)
  • 1 tsp baking soda
  • 1 pinch salt
  • 1 egg
  • 1/3 cup almond butter
  • 1 tbsp coconut oil (liquid)
  • 1 tsp vanilla
  • 1/4 cup chocolate chips

Instructions
 

  • Preheat your oven to 350F and line or grease your baking sheet.
  • Combine dry ingredients in a large bowl. Mix well. Add wet ingredients and mix well.
  • Place cookies (~1 tbsp of dough) on sheet. The cookies don’t spread much, so pat down the balls of dough with your hand to desired width. Bake 8-11 minutes and enjoy 😊

Notes

DISCLAIMER: I live in a shit apartment with a shit oven. When I preheat my oven, I also preheat my apartment. Remember this when considering my baking times.
Keyword almond butter, almond flour, chocolate chip, cookies, easy, fast, gluten-free, grain-free, low carb, low-sugar, one-bowl, paleo, quick

Filed Under: Breakfast, Dessert, Recipes

Primary Sidebar

Follow on Instagram
This error message is only visible to WordPress admins

Error: No posts found.

Make sure this account has posts available on instagram.com.

For more workouts, healthy food recipes, and wellness tips, connect with me below:

Recent Posts

  • The Acne Series Part 1: How to Deal
  • Paleo Banana Chocolate Protein Muffins (grain-free, gluten-free, refined-sugar-free)
  • Quarantine Calendar
  • The Gritention-Setting Calendar
  • Intention Setting Phone Backgrounds

Archives

  • April 2020
  • March 2020
  • February 2020
  • November 2019
  • October 2019
  • September 2019
  • June 2019
  • May 2019
  • April 2019
  • March 2019
  • February 2019
  • January 2019

Categories

  • Breakfast
  • Dessert
  • Fitness
  • Lifestyle
  • Main Dishes
  • Plant.
  • Recipes
  • Snacks
  • Trail Snacks
  • Uncategorized

Copyright © 2025 on the Foodie Pro Theme